 by
by In this step by step tutorial, you will learn about RabbitMQ. We would build a Spring Boot project using IntelliJ. This tutorial covers the following
- What is RabbitMQ?
- How to Install and Configure RabbitMQ
- View the RabbitMQ Console
- Setup the Spring Application and Profiles
- Send a Message to the Queue
- Receive a Message from the Queue
- Testing Send and Receive
- Watch the Video
1. What is RabbitMQ?
Well, RabbitMQ is a message broker. The next question is, ‘what is message broker?’. A message broker is simply a computer program that relays messages from the source(sender) to the destination(receiver).
The sender and receiver could be different microservices. Or perhaps, completed different applications.
Why we need a Message Broker
According to the book ‘Practical Microservices Architectural Patterns’, messages helps to gracefully accommodate downtime or failures of coordinating applications. This means that if a microservice wants to send a message to another microservice but the destination microservice is down, then the message broker could store this message. So when the destination microservice is up, it could retrieve this message from the message broker.
We’ll demonstrate this in this tutorial.
2. How to Install and Configure RabbitMQ
To install and configure RabbitMQ, follow the steps below:
Step 1: Download and install Erlang. RabbitMQ requires Erlang to be available in your machine. Download Erlang here
Step 2: Set ERLANG_HOME environment veriable to the location of your Erlang installation (you can see the video on how to do this). In my setup, the ERLANG_HOME is set to D:\ProgramFiles\erl10.7
Step 3: Download RabbitMQ from here. Simply run the installer to install RabbitMQ.
3. Start RabbitMQ and View the Dashboard
RabbitMQ provides a management dashboard as an HTTP-bases API for managing and monitoring the RabbitMQ server. This comes with a dashboard which you can access from the browser. Follow the steps below:
Step 1: Open command prompt and navigate to sbin folder inside the RabbitMQ install directory. For me, the directory is D:\ProgramFiles\RabbitMQ Server\rabbitmq_server-3.8.3\sbin
Step 2: Enable the management dashboard using the command:
rabbitmq-plugins enable rabbitmq_management
Step 3: Start RabbitMQ by running the command
rabbitmq-server.bat
The above command starts up the management console in default port 15672
Step 4: Open your browser and visit
http://127.0.0.1:15672
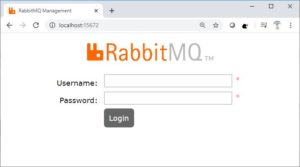
Login using the username: quest and password: guest;
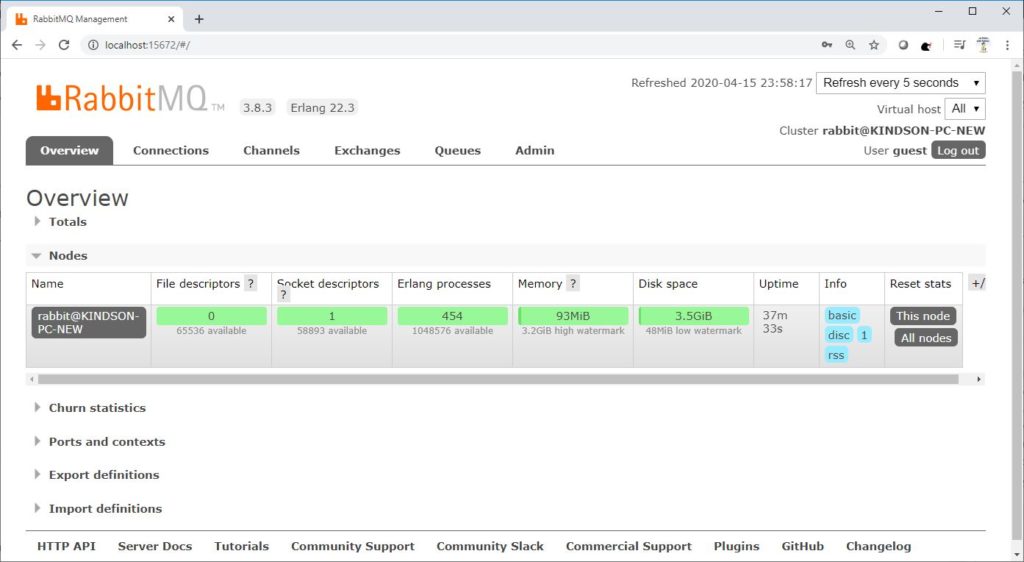
The dashboard is shown below:
Once you login, you’ll see the dashboard as shown below:
4. Setup the Spring Application and Profiles
Build a new Spring Starter project (you can use Spring Tool Suite or IntellliJ IDE).
Add the following dependencies:
<dependency>
	<groupId>org.slf4j</groupId>
	<artifactId>slf4j-api</artifactId>
	<version>1.7.30</version>
</dependency>

<dependency>
	<groupId>org.springframework.boot</groupId>
	<artifactId>spring-boot-starter-amqp</artifactId>
</dependency>
Next, in the base application class you need to declare a logger factory and the queue-name. The logger factory is used to log messages to the output. Use the two lines below:
private final static String QUEUE_NAME = "hello";

static Logger logger
		= LoggerFactory.getLogger(DistributedMessagingApplication.class);
Now, you need to creat etwo profiles: send and receive. The Send.java class would run on the ‘send’ profile while the Receive.java would run on the receive profile.
You need to create these profile using the Run Configuration. Just in case, you don’t know, profiles allow you to split an application into two parts which can run separately.
See how to create profile here.
5. Send a Message to the Queue
Create a class named Send.java. This class contains the code to send a message to the queue. Also notice the @Profile annotation. This means that this class would run independently on the ‘send’ profile.
The content of the Send.java class is given below
@Profile("send")
public class Send {
    static Logger logger
            = LoggerFactory.getLogger(Receive.class);

    private final static String QUEUE_NAME = "hello";

    public  static void main(String[] argv)
            throws IOException, TimeoutException {
        ConnectionFactory factory = new ConnectionFactory();
        factory.setHost("localhost");
        Connection connection = factory.newConnection();
        Channel channel = connection.createChannel();
        channel.queueDeclare(QUEUE_NAME,
                false,
                false,
                false,
                null);
        String message = "Welcome to RabbitMQ";
        channel.basicPublish("",
                QUEUE_NAME,
                null,
                message.getBytes("UTF-8"));
        logger.debug("[!] Sent '" + message + "'");
        channel.close();
        connection.close();
    }
}
6. Receive a Message from the Queue
Create a class named Receive.java. This class would run on the ‘receive’ profile. You also need to create the receive profile as before.
The content of the file is given below:
@Profile("receive")
public class Receive {
    static Logger logger = LoggerFactory.getLogger(Receive.class);

    private final static String QUEUE_NAME = "hello";

    public  static void main(String[] argv)
            throws IOException, TimeoutException {
        ConnectionFactory factory = new ConnectionFactory();
        factory.setHost("localhost");
        Connection connection = factory.newConnection();
        Channel channel = connection.createChannel();
        channel.queueDeclare(QUEUE_NAME,
                false, false,false, null);
        logger.info("[!] Waiting for messages. To exit press Ctrl+C");

        Consumer consumer = new DefaultConsumer(channel){
            @Override
            public void handleDelivery(String consumerTag,
                                       Envelope envelope,
                                       AMQP.BasicProperties properties,
                                       byte[] body)
                    throws IOException {
                String message = new String(body, "UTF-8");
                logger.info("[x] Message Recieved' " + message + "'");
            }
        };
        channel.basicConsume(QUEUE_NAME, true, consumer);
    }
}
7. Testing Send and Receive
Now you can first run the application using the ‘send’ configuration. You’ll see in the console window a message that says: “Message sent…
Then go back to the RabbitMQ Dashboard.
Click on the Queues tabs
Expand on Messages and click on GetMessages.
You will see the message “Welcome to RabbitMQ”
Go back to IntelliJ and run the application using the ‘receive’ configuration.
One the application starts, you can see in the console window that the message is received.
Finally, go back and check the RabbitMQ Dashbaord for the messages. You’ll notice that they are no longer there.
So once a message is published, then it is retrieved and removed from the queue.
Thanks for learning!. If you have any challenges please let me know in a comment. Also, you can watch the video for clarification.

[…] See tutorial on how to setup RabbitMQ. […]