by
by In this part, we are going to implement and Grid and populate the grid with data. We would consider the following sub-headings
1. How we would Achieve This
We would first create method that returns a grid. Inside this method, we would create a new grid.Then add three columns to the grid. Finally, we set the grid’s data provider property to our data provider.
After this, we would go to the init method and create a vertical layout. In this vertical layout, we first add the original command bar(with Command and Issue Panel). The we also add the grid we created.
2. Creating the Grid
Follow the steps below:
Step 1: Create a method named summaryGrid that returns a Grid<CardSummary>
Step 2: Inside this method, create a new Grid<CardSummary> grid.
Step 3: Add three columns to the grid. The column captions are: Id, Initial Balance and Remaining Balance. The syntax for adding columns is given below
grid.addColumn(CardSummary::getId).setCaption("Id");
Step 4: Set the dataProvider property of the grid to the dataProvider
Step 5: Return the grid
The complete code for the summaryGrid method is given below:
public Grid<CardSummary> summaryGrid(){
    Grid<CardSummary> grid = new Grid<CardSummary>();
    grid.SetSizeFull();
    grid.addColumn(CardSummary::getId).setCaption("Id");
    grid.addColumn(CardSummary::getInitialBalance).setCaption("Initial Balance");
    grid.addColumn(CardSummary::getRemainingBalance).setCaption("Remaining Balance");

    grid.setDataProvider(dataProvider);
    return grid;
}
3. Refresh Grid After Changes
Anytime a change is made, whether a GiftCard is issued or redeemed, we need to refresh the grid view. One way to do that is to add a closeListener to the Notification message. So anytime the notification message closes, the grid refreshed
To achieve that, follow the steps below:
Step 1: Append the code below to the end of the Notification.show() message
.addCloseListener(x -> dataProvider.refreshAll());
Step 2: Do the same for the second Notification.show() message.
4. Add the Grid to the Layout
Take the steps below to add the grid to the layout.
Step 1: In the init() method, just before the setContent() line, create a new vertical layout
Step 2: Set the size to Full
Step 3: Add commands and summaryGrid to the layout using layout.setContent() and passing two arguments
Remember commands is a horizontal layout that contains the two panels while summaryGrid is the grid.
The complete init method is given below:
@Override
protected void init(VaadinRequest vaadinRequest) {
    HorizontalLayout commands = new HorizontalLayout();
    commands.setSizeFull();
    commands.addComponents(issuePanel(), redeemPanel());

    VerticalLayout layout = new VerticalLayout();
    layout.setSizeFull();
    layout.addComponents(commands, summaryGrid());

    setContent(layout);

    //Error Handler
    setErrorHandler(new DefaultErrorHandler(){
        @Override
        public void error(com.vaadin.server.ErrorEvent event) {
            Throwable cause = event.getThrowable();
            while (cause.getCause() != null) cause = cause.getCause();
            Notification.show(cause.getMessage(), Notification.Type.ERROR_MESSAGE)
            .addCloseListener(x -> dataProvider.refreshAll());
        }
    });
}
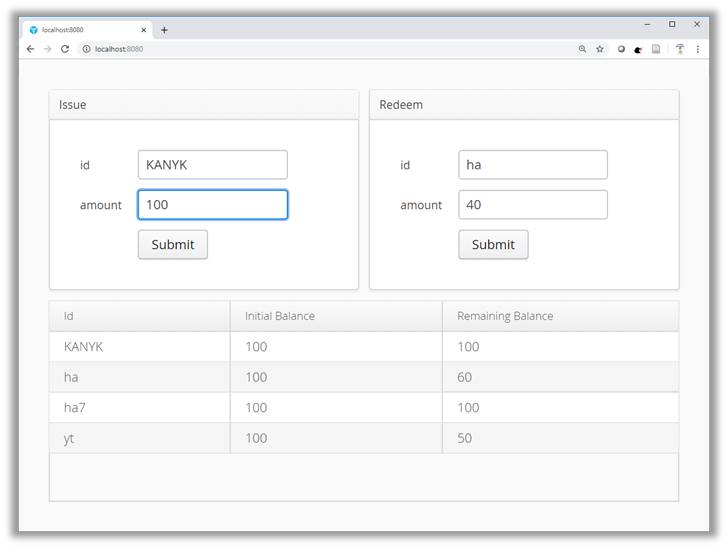
Step 4: Run the application and test it by issuing and redeeming some cards. Then check that the history appears in the grid below. The output is shown below:
5. Next Steps
Now we have out application running on our local machine. Of course, it’s still a monolithic application.
So next we would split this application into microservices using spring profiles
Then we use AxonHub to connect the various microservices. Finally, we deploy to kubernetes cluster in Google cloud. So we have more interesting things to to. However if you have gotten to this point successfully, big thumbs up to you!