 by
by Previously in this Tutorial, we learnt how to split a single structured monolith into microservices. We did this using Spring Profiles.
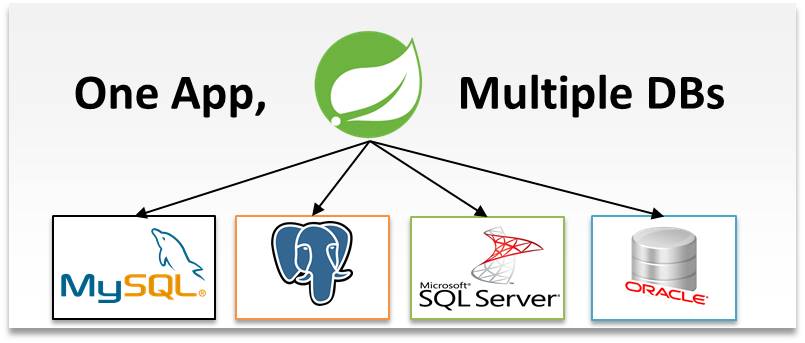
In this lesson, we would learn how to configure multiple databases for a structured monolithic application. This is very important if you are testing the performance of different database scenarios for database per service (DBPS) microservice architecture.
1. Prerequisites
- MySQL Database
- PostgreSQL (Optional)
- MS SQL Database (Optional)
In this demo, we would only use two datasources: MySQL and PostgreSQL. We do this for simplicity and clarity.
You can also use two MySQL databases just to follow this demo.
Before you start: Create a database in MySQL called admissionsdb and another database in PostgreSQL call appointmentsdb.
2. How It Works
It would be similar to your normal application but with a few changes
- The application.properties file would now contain multiple setting each for a different datasource
- You need configuration classes, one for each of the datasources. One of the configuration classed must be set as Primary using the @Primary annotation.
- The configuration classes would contain mandatory methods:
- DataSource method
- LocalContainerEntityManagerFactoryBean method
- PlatformTransactionManager method
- Of course, you need a model class and a repository interface.
So, let’s give it a shot!
We would be using IntelliJ in this demo. However, the complete project can be found here in my GitHub repository. Feel free to clone or download it
Step 1: Create a spring application and create two packages admissions and appointments
Step 2: Create a the Appointment class in the appointment package. The Appointment Class is shown below:
@Entity
@Data
@AllArgsConstructor
@NoArgsConstructor
@Table(name="appointment")
public class Appointment
{
    @Id
    private int id;
    private String status;
}
Step 3: Create the Admission Class in the admission package. The admissions class is shown below:
@Entity
@Data
@AllArgsConstructor
@NoArgsConstructor
@Table(name="admission")
public class Admission {
    @Id
    private int id;
    private String description;
}
Step 4: Create the AppointmentRepository interface in the appointments package
Step 5: Create the AdmissionRepository interface in the admissions package
Step 6: Open the application.properties file and add the following settings for MySQL and PostgreSQL
#Appointments Datasource
spring.appointments.datasource.jdbcUrl=jdbc:postgresql://localhost:5432/appointmentsdb
spring.appointments.datasource.username=postgres
spring.appointments.datasource.password=root

#Admissions Datasource
spring.admissions.datasource.jdbcUrl=jdbc:mysql://localhost:3301/admissionsdb?serverTimezone=UTC
spring.admissions.datasource.username=root
spring.admissions.datasource.password=root
spring.admissions.datasource.driver-class-name=com.mysql.cj.jdbc.Driver

spring.jpa.generate-ddl=true
spring.jpa.show-sql=true
You can see the setting for the two datasources. Take note that the datasources are differentiated based on the prefixes: spring.admissions and spring.appointments. Now, if you want to add more data sources, do feel free.
The last two statements applies to both datasources.
Step 7: Now create the AdmissionsDBConfig class inside the admissions package. Annotate this class with annotations as shown below:
@Configuration
@EnableTransactionManagement
@EnableJpaRepositories(
        entityManagerFactoryRef = "entityManagerFactory"
)
public class AdmissionsDBConfig {

	// Datasource method goes here

	// LocalContainerEntityManagerFactoryBean goes here

	// PlatformTransactionManager goes here

}
Step 8: Write the function that returns the admissions datasource. This is shown below:
@Primary
@Bean(name="datasource")
@ConfigurationProperties(prefix = "spring.admissions.datasource")
public DataSource dataSource(){
    return DataSourceBuilder.create().build();
}
Take note that in this listing the function is annotated with the @Primary annotation
Step 9: Write the function that returns a LocalContainerEntityManagerFactory. Also annotated with @Primary annotation as shown below
@Primary
@Bean(name="entityManagerFactory")
public LocalContainerEntityManagerFactoryBean entityManagerFactoryBean(
        EntityManagerFactoryBuilder builder,
        @Qualifier("datasource") DataSource dataSource
)
{
	Map<String, Object> properties = new HashMap<>();
	properties.put("hibernate.hbm2ddl.auto", "update");
	properties.put("hibernate.dialect", "org.hibernate.dialect.MySQL5Dialect");
    return builder
            .dataSource(dataSource)
            .properties(properties)
            .packages("com.kindsonthegenius.multipledb.admissions")
            .persistenceUnit("Admission")
            .build();
}
Step 10: Write the function that returns the transactionManager object
@Primary
@Bean(name="transactionManager")
public PlatformTransactionManager transactionManager(
        @Qualifier("entityManagerFactory") EntityManagerFactory entityManagerFactory
)
{
    return new JpaTransactionManager(entityManagerFactory);
}
Step 11: Repeat steps 7 to 10 but this time for the appointment package.
Also remember: Remove the @Primary annotation for the methods in the AppointmentsDBConfig.
The complete content of the AppointmentsDBConfig is given below:
@Configuration
@EnableTransactionManagement
@EnableJpaRepositories(
        entityManagerFactoryRef = "appointmentsEntityManagerFactory",
        transactionManagerRef = "appointmentsTransactionManager"
)
public class AppointmentsDBConfig {

	@Bean(name="appointmentsDatasource")
	@ConfigurationProperties(prefix = "spring.appointments.datasource")
	public DataSource dataSource(){
	    return DataSourceBuilder.create().build();
	}

	@Bean(name="appointmentsEntityManagerFactory")
	public LocalContainerEntityManagerFactoryBean entityManagerFactoryBean(
	        EntityManagerFactoryBuilder builder,
	        @Qualifier("appointmentsDatasource") DataSource dataSource
	)
	{
	    return builder
	            .dataSource(dataSource)
	            .packages("com.kindsonthegenius.multipledb.appointments")
	            .persistenceUnit("Appointments")
	            .build();
	}

	@Bean(name="appointmentsTransactionManager")
	public PlatformTransactionManager transactionManager(
	        @Qualifier("appointmentsEntityManagerFactory")
	        EntityManagerFactory entityManagerFactory
	)
	{
	    return new JpaTransactionManager(entityManagerFactory);
	}
}
3. Insert and Query Some Test Data
Follow the steps below.
Step 1: Open the main application class. Annotate this class with the @RestController annotation (we are going to add REST endpoints here) . This is done for simplicity as you could also have create separate controller classes.
Step 2: Autowire both the AppointmentRepository and the AdmissionRepository into this class. The code is shown below:
@Autowired
private AdmissionRepository admissionRepository;

@Autowired
private AppointmentRepository appointmentRepository;
Step 3: Add a method annotated with @PostConstruct to add some appointments data into the appointments database
Step 4: Add a method annotated with @GetMapping(“/getAppointments”) to retrieve list of appointments. Both methods are shown below:
/******************************************************************************
 * ENDPOINTS FOR APPOINTMENTS SERVICE
 ******************************************************************************/
@PostConstruct
public void addAppointmentsData() {
	appointmentRepository.saveAll(Stream.of(
			new Appointment(101, "Teh first appointment ever"),
			new Appointment(102, "Appointment with a Dentist"))
			.collect(Collectors.toList()));
}
@GetMapping("/getAppointments")
public List<Appointment> getAppointmens(){

	return appointmentRepository.findAll();
}
Note: You could also write a simpler code by creating and inserting appointments one by one. You could also use a data.sql file placed inside src/main/resources folder.
Step 5: Repeat step 3 and step 4 for the admissions database.
At this point, we are good to go!
Step 7: Run the application and visit http://localhost:8080/getAdmissions and do same for Appointment.
If everything went successfully, then thumbs up to you! Else, clone the repository and check where you got it wrong.

